 There is no doubt that getting results from Facebook in 2018 is harder than ever.
While Facebook continues to roll out News Feed changes at an alarming pace, one vital feature not only seems to be insulated from declining reach, but also increasing in popularity – Facebook fundraising.
I’ve written and spoken quite a bit about Facebook’s free fundraising tools and how to leverage their ubiquity and ease-of-use to drive donations for your nonprofit.
Because Facebook Fundraisers are native to Facebook, these posts receive higher priority than an external link.
In addition, Facebook announced in November that they will be playing nice and syncing with other fundraising websites by allowing people to link external fundraising pages directly with Facebook.
This should all be welcome news to nonprofits, as the trend I am seeing on Facebook is active promotion of fundraisers using notifications.
For example, my friend was raising money to celebrate her birthday. She created a personal Facebook fundraiser, and anytime she updates it, I get a notification:
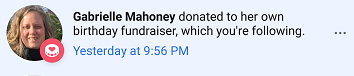
In another example, anytime any of my Facebook friends create fundraisers on Facebook, I get a notification:

Getting into the notifications stream is INFINITELY more effective than simply posting on your Facebook Page and hoping that 2% of your fans actually see it.
Live videos on Facebook generate an average of six times as many interactions as regular videos. When the power of fundraising on Facebook is paired with the most engaging and popular type of content on the site – Facebook Live – the possibilities are endless!
Here is my step-by-step guide to getting set up for success when using Facebook Live to raise money for your nonprofit.
Step 1: Register with Facebook.
People can add a donate button to their live video to help raise money for US-based 501c3 nonprofits, and now so can celebrities, nonprofits, and brands that have a verified Page on Facebook.
If you are a US-based 501c3 charity with a verified Page you can use video and other Facebook donation tools to raise funds for your nonprofit directly on Facebook when you apply and are approved by Facebook payments.
If you are not a 501c3 charity, or you decide not to register to get a verified Page on Facebook, don’t despair.
Read on, becuse there are a couple of hacks you can use to raise money even if you are not officially registered with Facebook.
Step 2: Get the latest version of Facebook or Pages Manager app.
This is an important step!
Make sure to update the app on your mobile device to make sure you have the latest version, or adding a Donate button may not work.
Step 3. Plan your event logistics.
Select a date and time to go live. Planning ahead will give you more time to promote the event and get more people watching when the time comes!
Choose a visually appealing location that isn’t too loud, unless that’s what you are going for – a protest, a march, or a concert.
Considerations include ambient sound, good lighting, and WiFi signal (you need a strong signal so the video won’t be interrupted).
Step 4. Determine your hook.
Going live is all well and good, but what are you going to do to grab people’s attention and keep it long enough so they can make a donation?
What’s your hook?
Great ways to engage people in a Facebook Live video include:
- Telling a personal story;
- Recounting a personal experience;
- Explaining your connection to the cause;
- Discussing current events around a cause.
Step 5: Let people know.
Let people know that you are going live!
Promote it like you would any other event.
Yes, people can still donate even after you end the live stream, but you will most likely get the majority of donations during the live event.
Be sure that you let your network know the following:
- Why are you fundraising for this project at this time?
- Why this amount?
- Why is this urgent and timely?
- Are you launching a new initiative, or growing an existing project?
- What are the outcomes you are aiming for?
- How much should people give? Providing suggested contribution amounts can remove barriers to giving.
Step 6. Go live!
Go into the app on your mobile device, and tap the “Live” button.
Before you go live, tape on the “…” button and see more options on the bottom left of your screen.
Tap “add donate button” and select your nonprofit.
When you are live, the donate button for the nonprofit you selected will be attached to the bottom of your video.
NOTE: Friends or fans can donate directly from the video as they watch, AND after you post the video to your Page (when the live stream ends).
Step 7: Welcome everyone.
Start your video with a welcome and an introduction – who are you, where are you, what are you doing?
Give people a few minutes to join the live stream.
Audience interaction is key!
When people join or comment, be sure to call them out by name and thank them for participating.
Step 8. Ask people to share the video.
In order to get a critical mass of people and increase the reach of the video, ask your viewers to share the video with their networks.
Say something like: “Thank you again so much for being here with me today to raise money for the local animal shelter. My goal is to get 100 people watching live and to raise $1500. Can you do me a big favor and hit the share button, so your friends and family can see this? I promise it will be good!”
Step 9. Ask for donations!
This is a new experience for many viewers, and it is important to explicitly call out the location of the donate button during the live video.
For example: “You can support by clicking the donate button in the right hand corner in this live video!”
People can see how much money has been raised in real time, so be sure to keep up the excitement!
Step 10. Keep up momentum!
The longer you are live, the more people who will join in, and this will result in more donations!
Several things you should be doing consistently throughout the live video:
- Audience interaction – shout out names of people when they join or comment.
- Updates on fundraising goal
- Ask people to share your video to their friends
- Tell people how to donate
What To Do If You Do Not Qualify For Facebook Payments
There are several restrictions on the kinds of nonprofits that can raise money directly within Facebook – read more who is eligible and how you can apply here.
If you absolutely cannot register for or do not quality for Facebook’s free fundraising tools, there are two hacks you can use to collect donations during a Facebook Live stream on an outside website:
1) Post the link to donate in the comments when you start the video, and encourage people to donate there.
The comment will get pushed down however as more people join the video and contribute their own comments, so you may have to post this link several times through the broadcast.
Remember, if they click the link while you are live they will leave Facebook and go to another website.
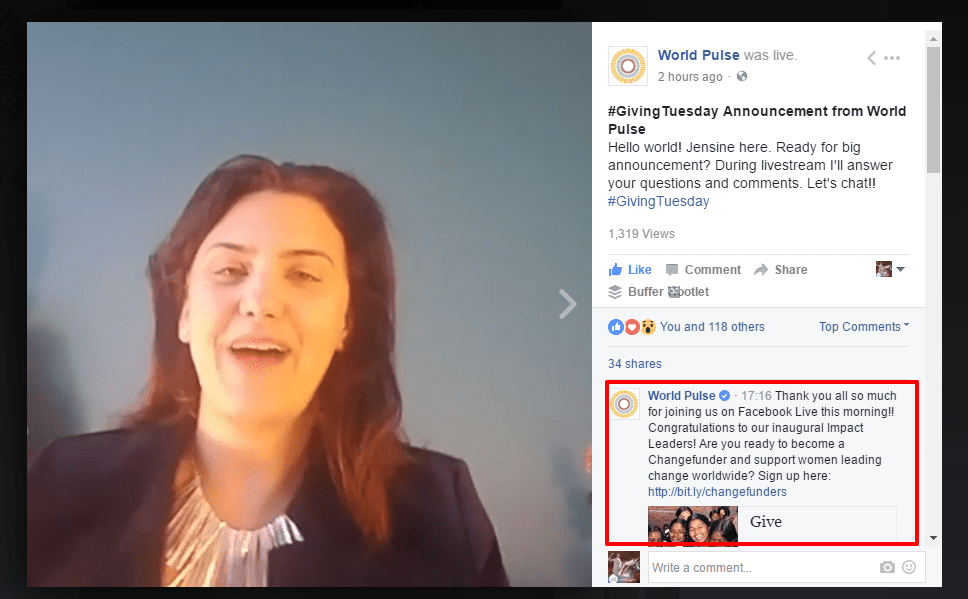
2) Add the donation page link to the comments after the Facebook Live video has ended.
See this example from World Pulse:
Have you used Facebook Live to fundraise for your nonprofit? Has it worked? Leave your thoughts in the comments.
Getting ready to dive into Facebook Live video? You need this checklist!

If you are exploring using Facebook Live for your nonprofit, you need my Essential Facebook Live Checklist for Nonprofits!
In this freebie download, I cover exactly what you need to do to plan, prepare, go live, and follow up afterwards.
Enter your email and then keep an eye on your inbox!